Learn how to perform the one-time installation of the scanning software, scan documents into NextGen Office, and upload scanned documents into a patient’s chart from the EHR. Our scanning feature is compatible on all supported Web browsers. Both Windows and Mac instructions are provided.
Note: The scanner must interact directly with the computer and cannot be a networked scanner.
For instructions on how to scan and upload documents to the patient’s chart from the Practice Management system, refer to Patient Documents. The scanning software installation procedure applies to both the EHR and the PM.
There is a required software security upgrade for existing users Upgrade instructions are available below.
Requirements
- TWAIN-compatible scanner (including all-in-one printers) with driver installed.
- Dynamsoft Dynamic Web TWAIN software installed
Note: Your scanning experience may vary depending on which OS and scanner you use.
Installation Tips
Installation permissions: You must have permissions to install software on your computer. If you do not have administrator permissions, please have your network administrator or IT professional install the software for you.
Windows Installer (MSI): Network administrators or IT professionals who would like to install the software using a Windows Installer file (Windows only) can access the MSI file.
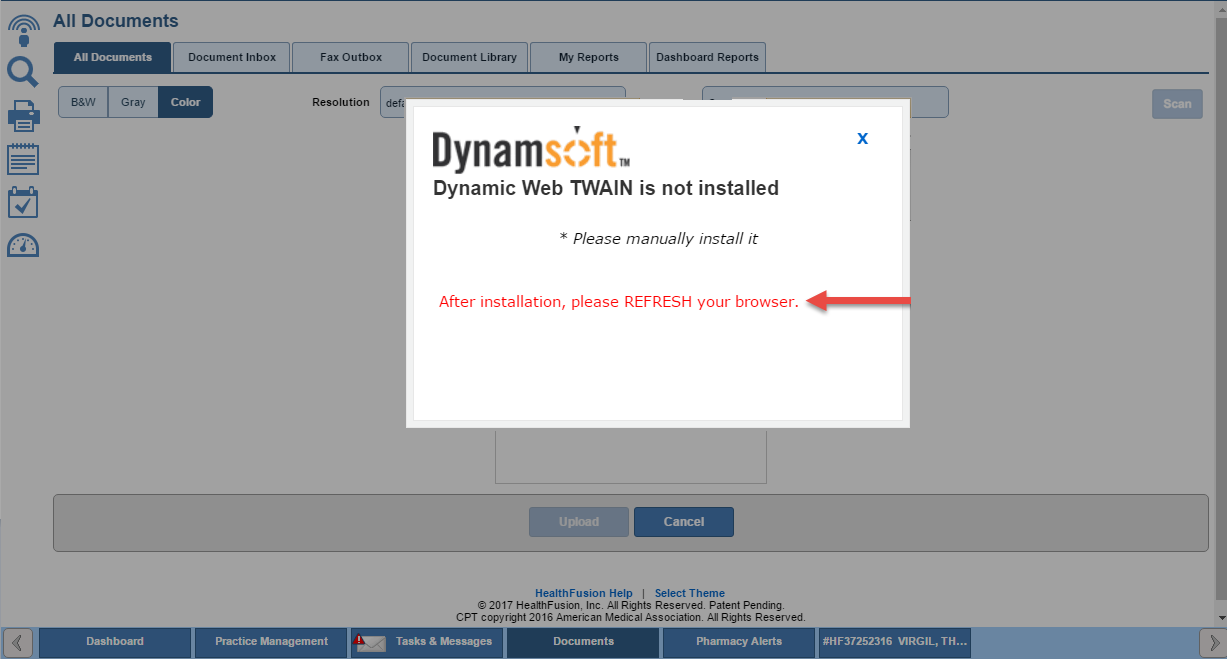
After installation is complete, refresh the browser.
Do not install the software more than once: If you try to install the software more than once and it is not working, you must start the installation process over from scratch. First, you must uninstall the software and restart your computer. Second, install the software again using the procedure provided here.
Install Scanning Software
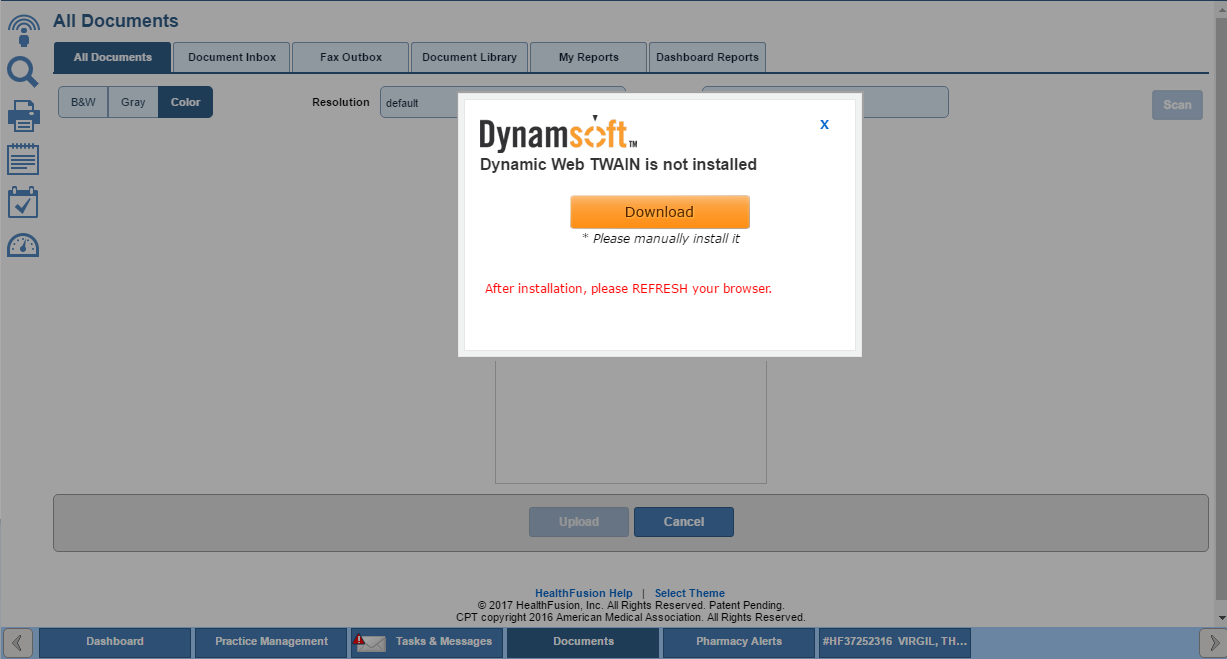
- The first time you attempt to scan, you are prompted for a one-time installation of the Dynamsoft Dynamic Web TWAIN software.
- Click Download.
- Where the installation file downloads, depends on the configuration of your browser and your OS (e.g., the file may download in your Downloads folder or at the bottom of your browser window).
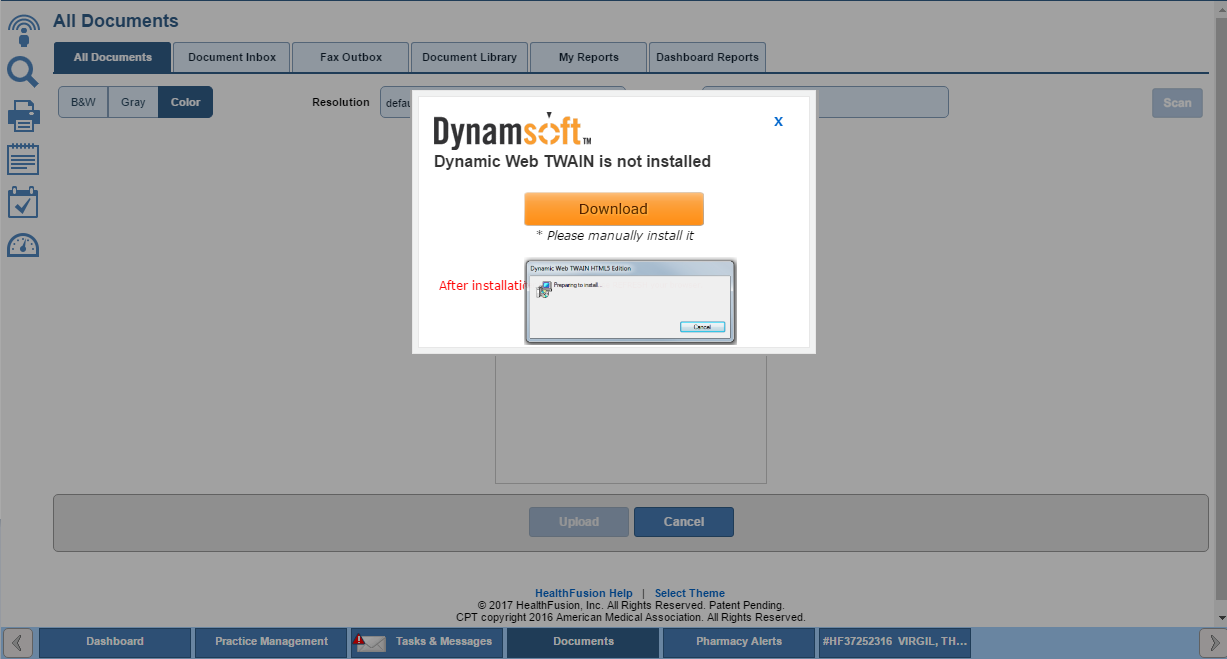
- The software prepares to install.
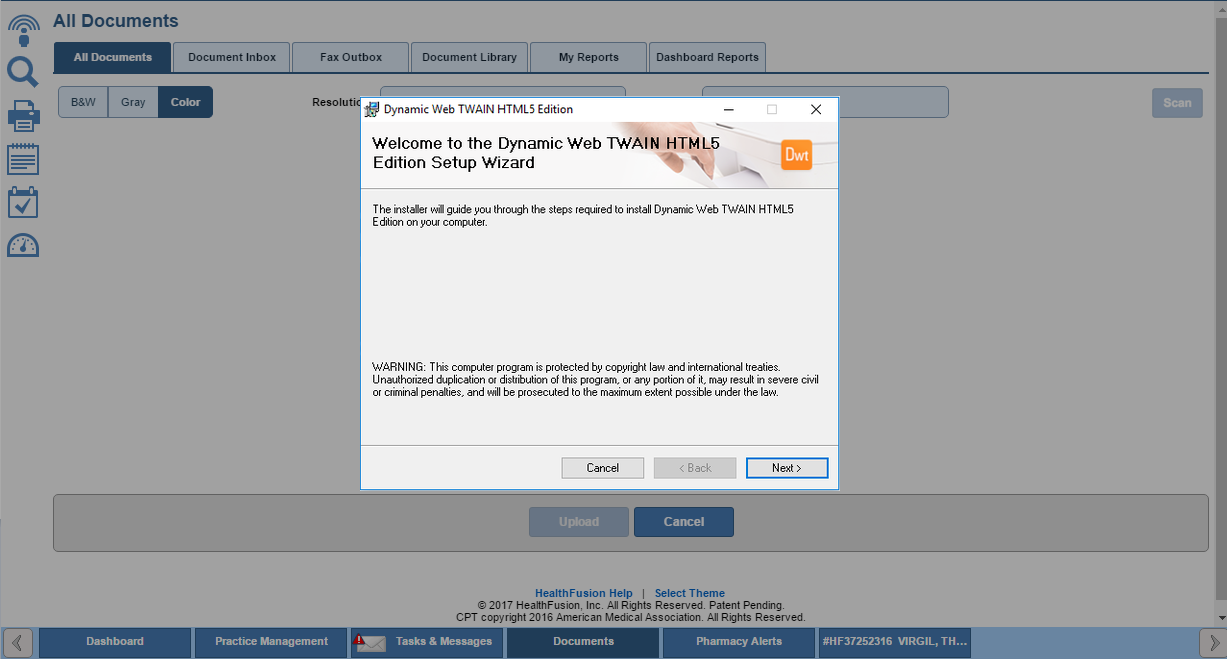
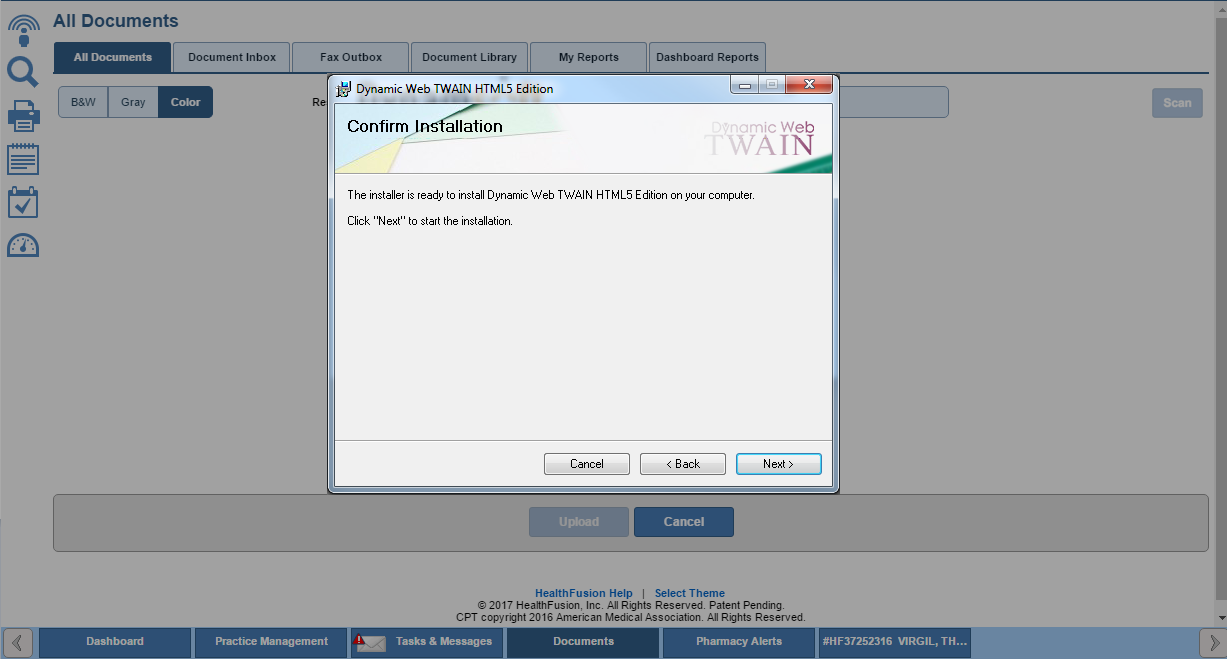
- The Dynamic Web TWAIN setup wizard launches.
- Click Next.

- The installer is ready to install the software.
- Click through the installation process.
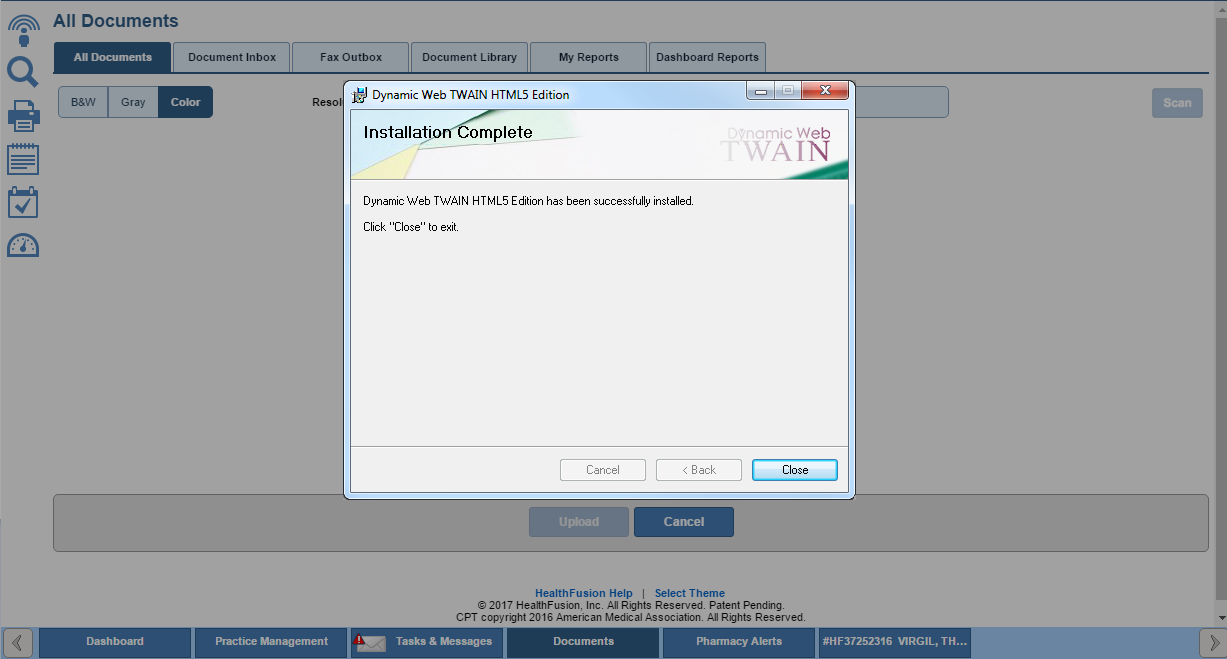
- Installation is complete.
- Click Close to exit the installer.
- Important: Do not attempt to install the software again.
- Now that installation is complete, make sure you refresh your browser.
- We recommend that you restart your computer. After you log back in to NextGen Office, the software should be working as expected.
Upgrade Software
Note: These instructions are for users who have previously downloaded the Dynamsoft software and now are required to upgrade
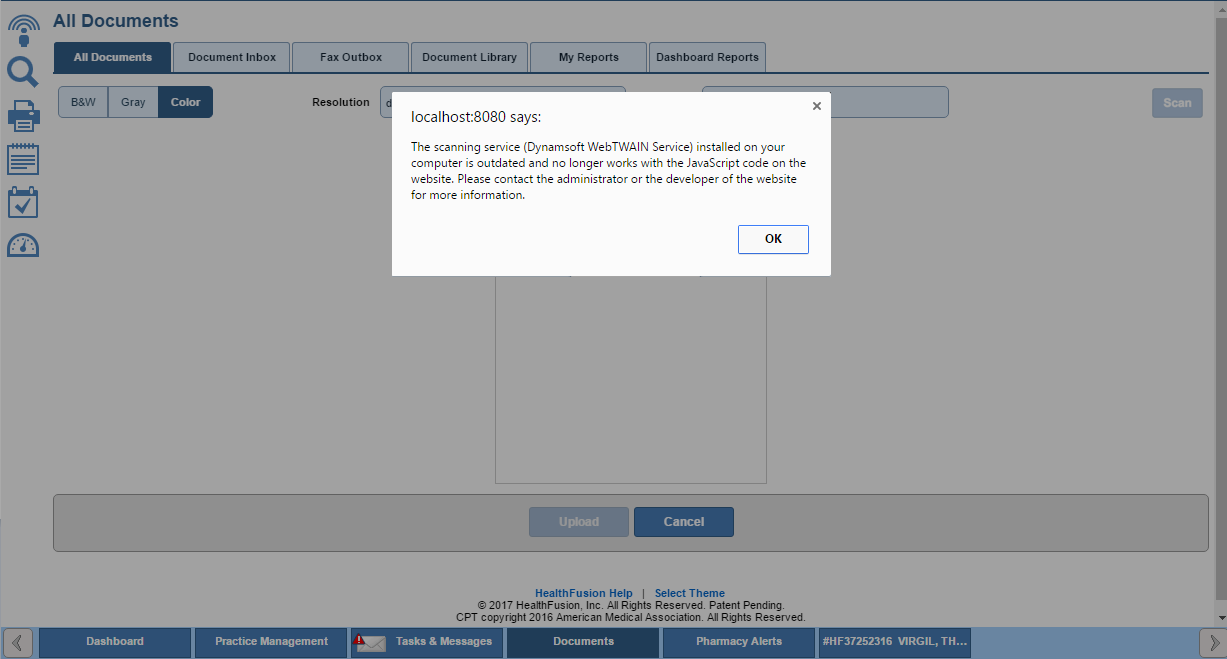
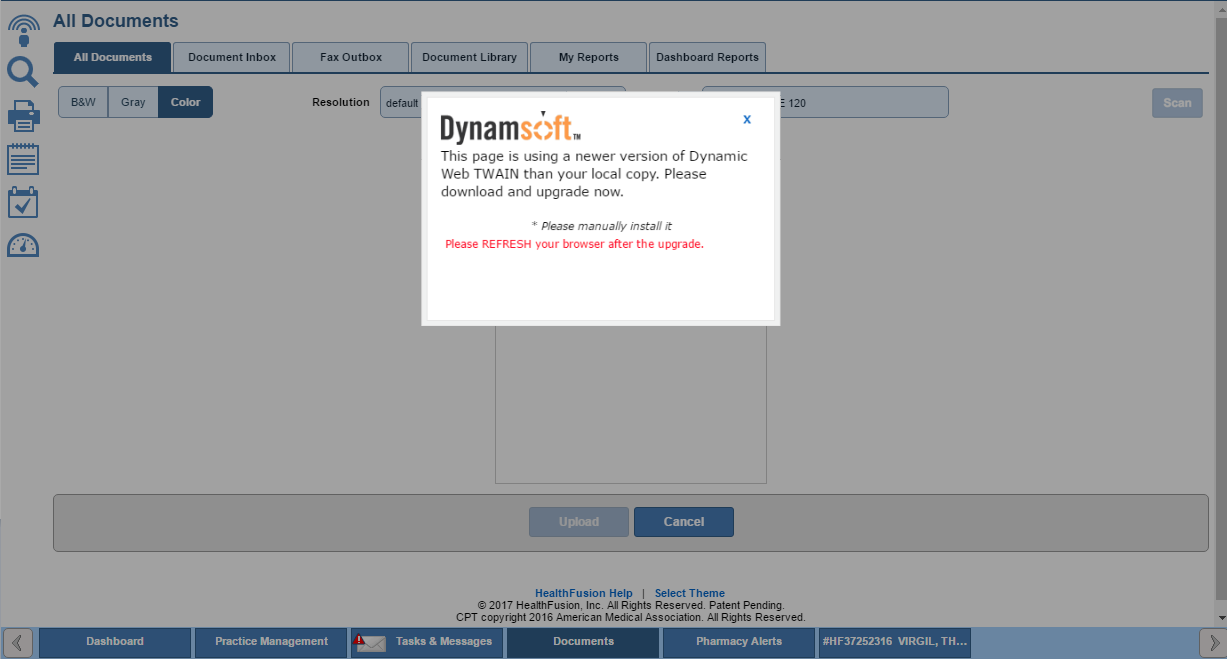
- When you click Scan on the All Documents page, you are notified that a software upgrade is available.
- Click OK.
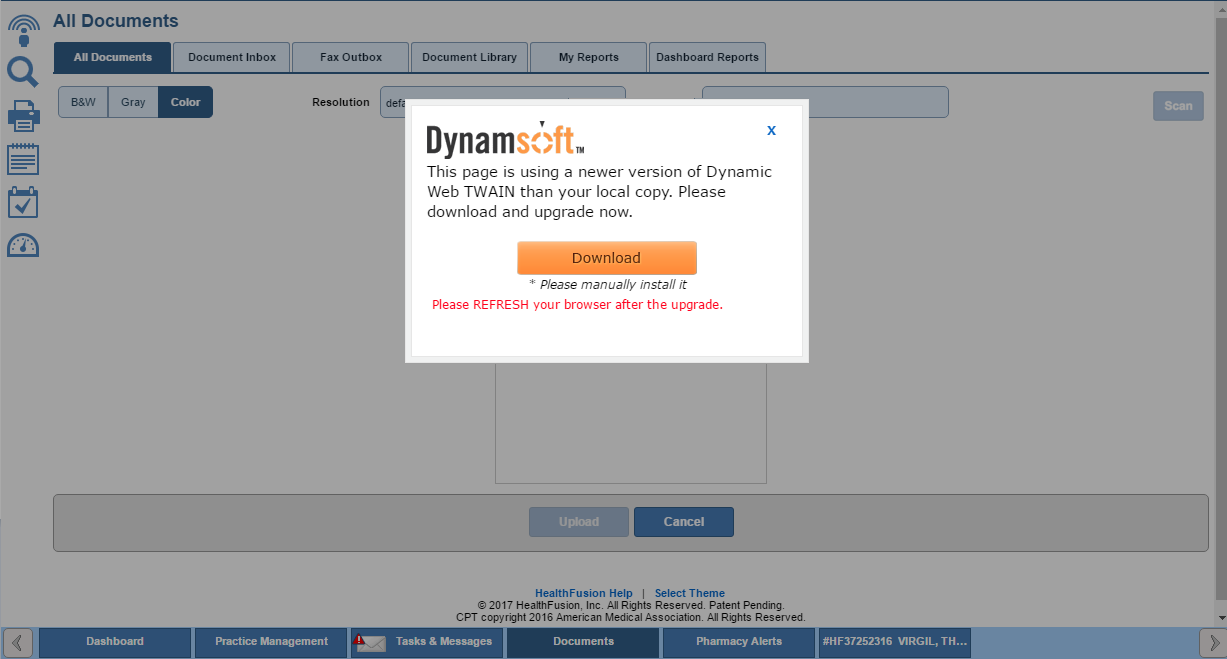

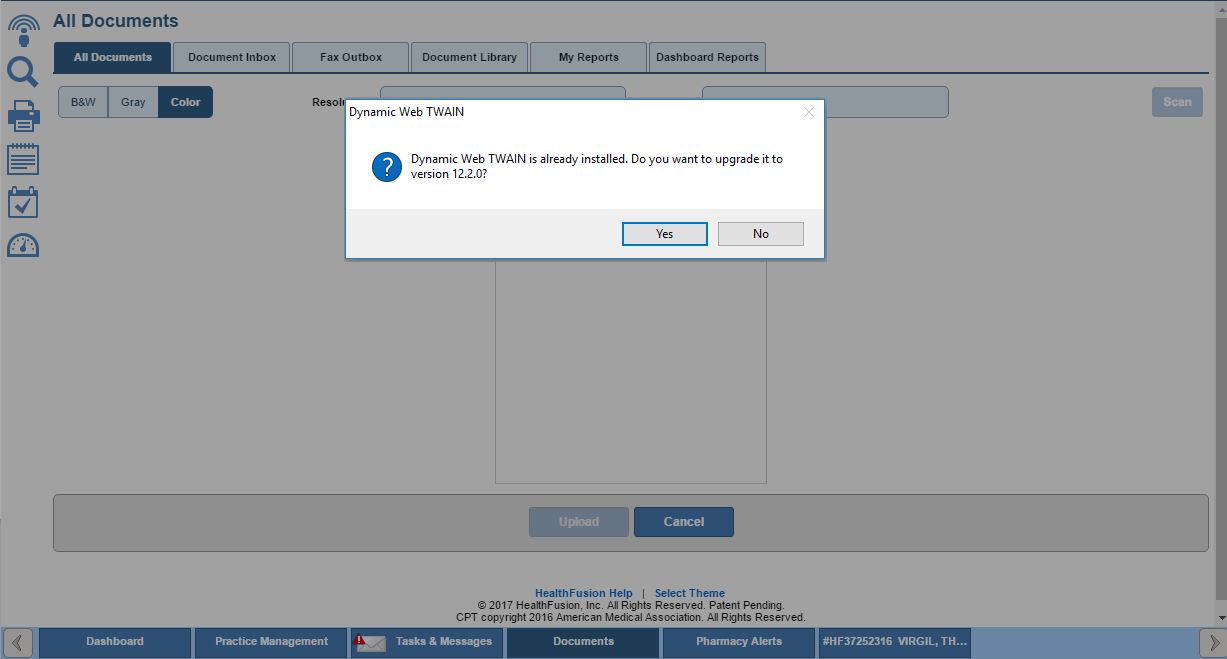
- Since you already have the software installed, you are asked if you want to upgrade.
- Click Yes.

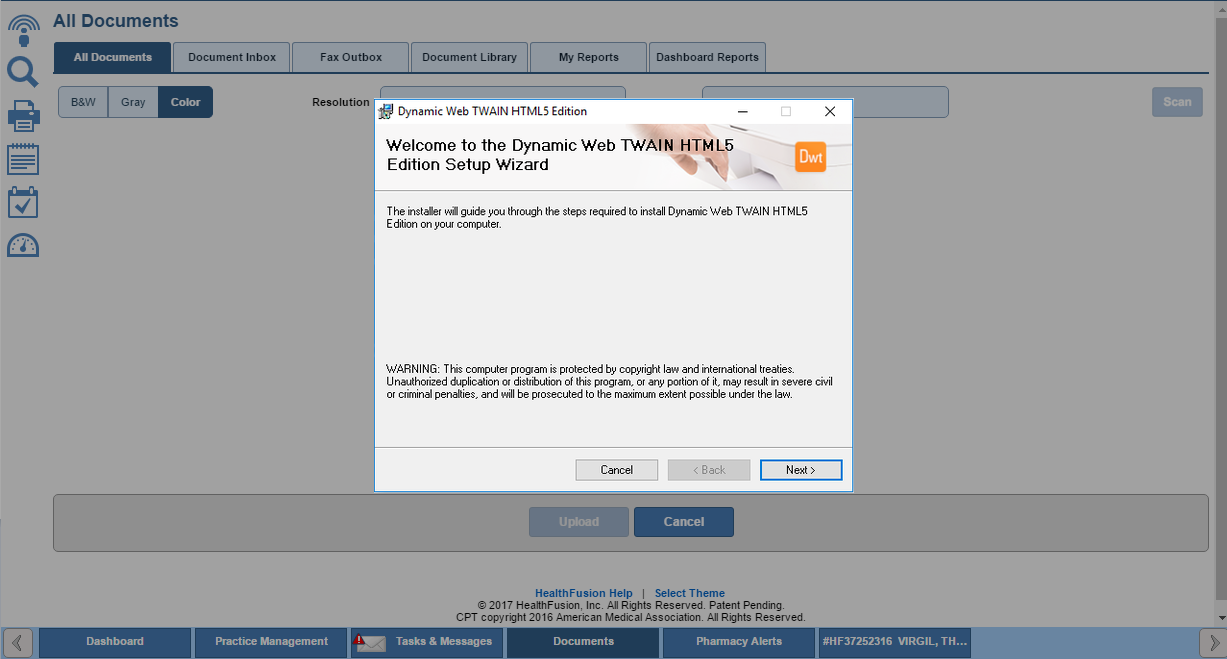
- The Dynamic Web TWAIN setup wizard launches.
- Click Next and click through the installation.

- Now that installation is complete, make sure you refresh your browser.
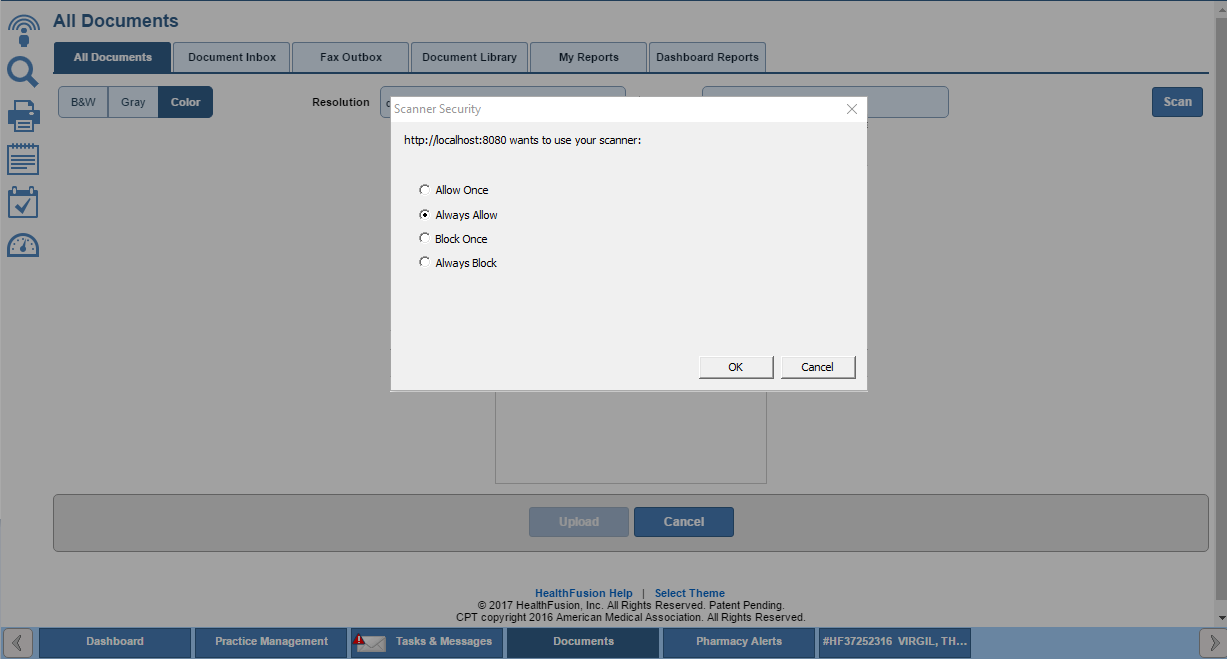
- When trying to scan, you may see this security question, select Always Allow.
- Click OK.
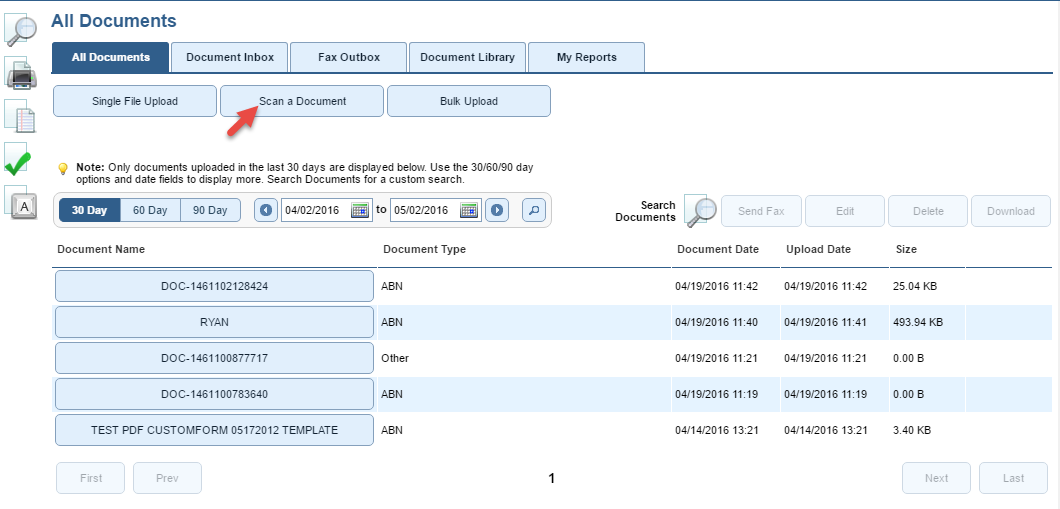
Scan a Document
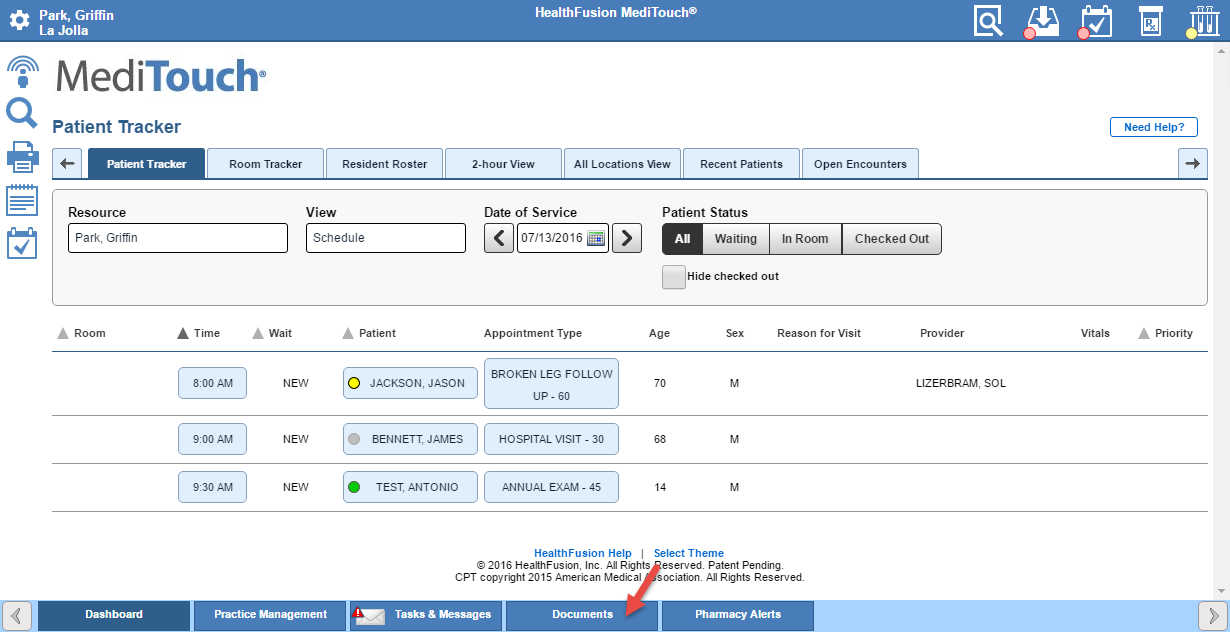
- From the EHR Dashboard, click Documents on the bottom blue bar.
Scan Using Windows
These instructions are based on Windows 10.
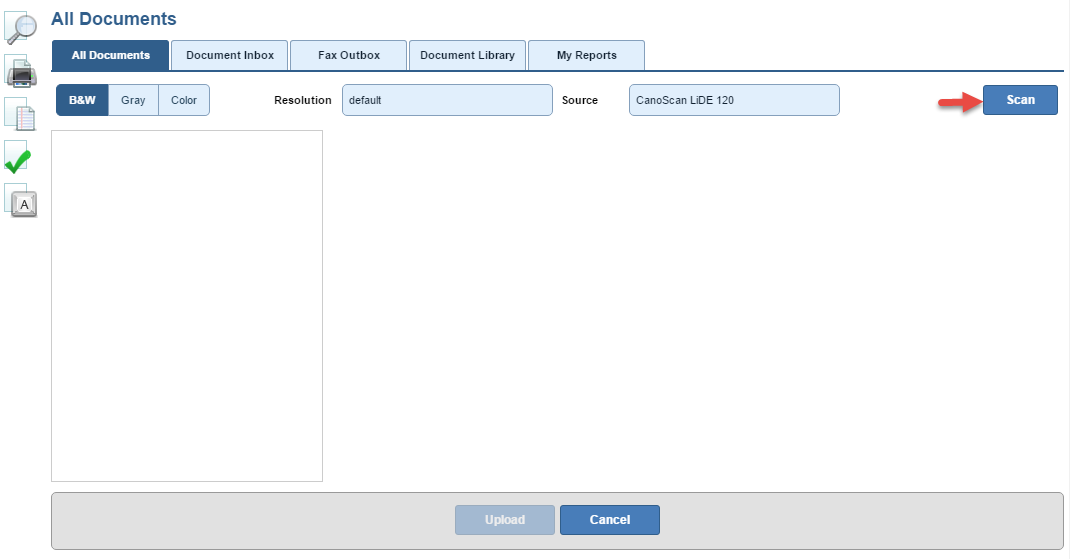
- Place the page to be scanned on the scanner.
- You do not need to make color or resolution selections if your scanner launches its own scanning tool.
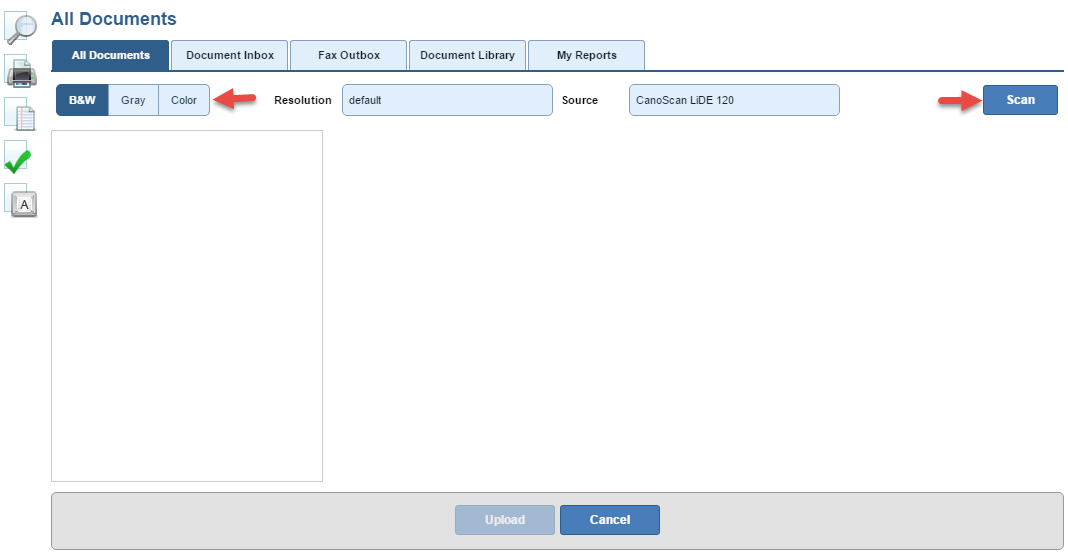
- Click Scan.

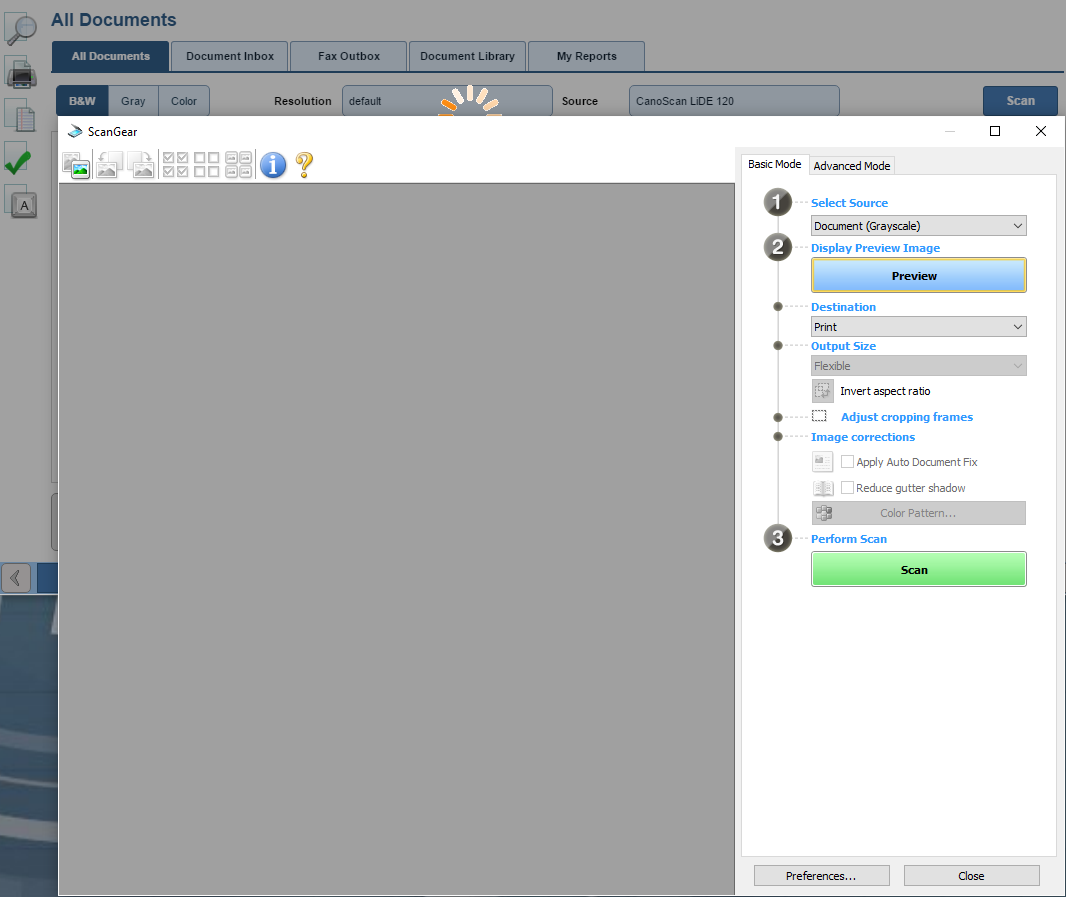
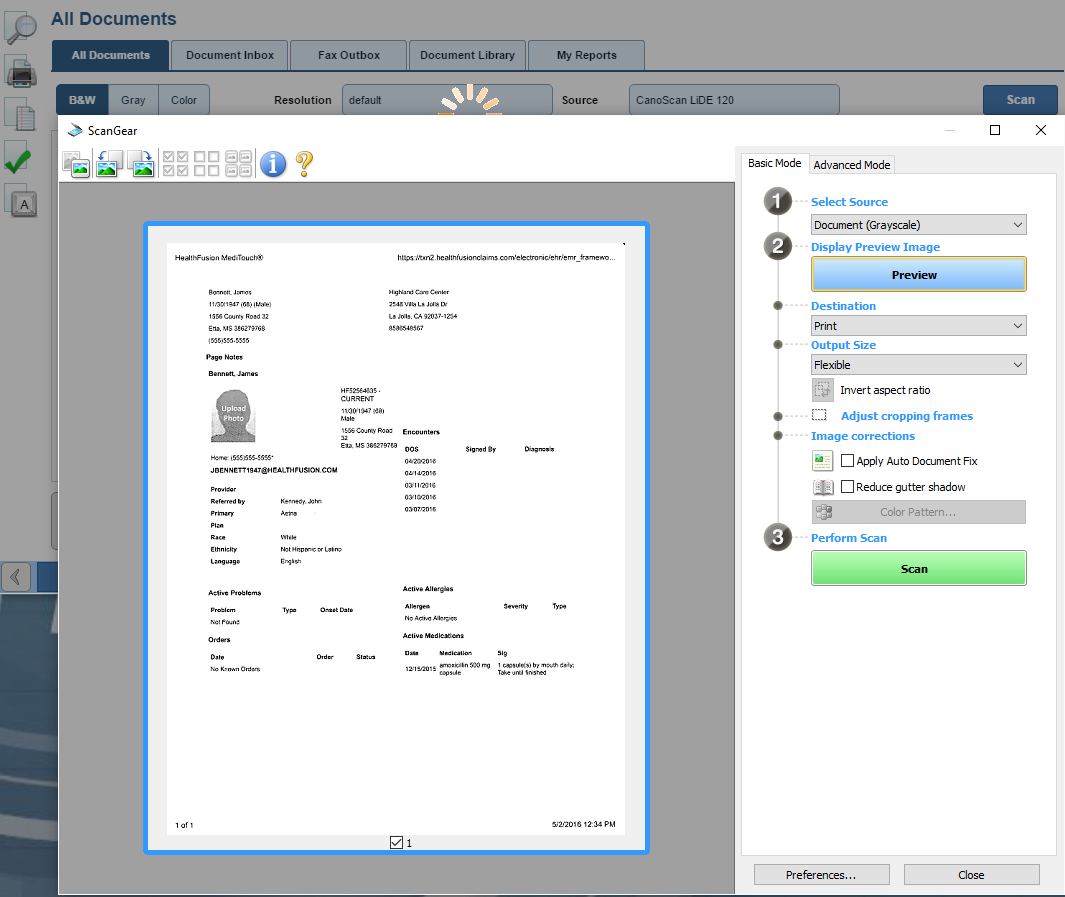
- The ScanGear tool launches. Note: Your scanner may launch a different tool or behave differently.
- Make your scanning selections.
- Click Preview if you want to preview the document.
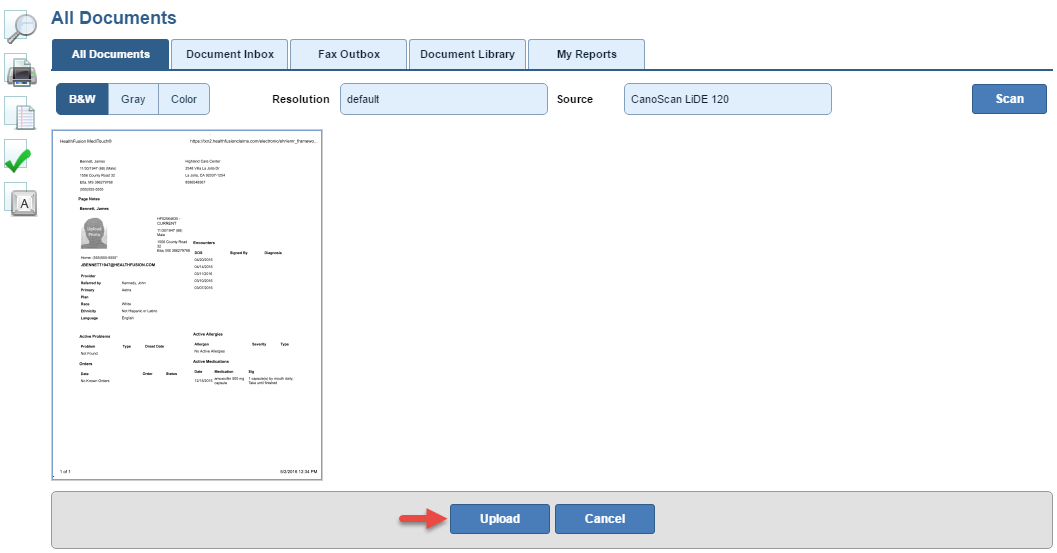
- A successfully scanned page.
- Continue to scan each page of the document you wish to upload.
- Click Upload to upload the scanned document (see Upload the Document).
Scan Using Mac
These instructions are based on Mac OS X El Capitan (version 10.11).

- Place the item to be scanned on the scanner.
- Select the color and resolution.
- Click Scan.
- A successfully scanned page.
- Continue to scan each page of the document you wish to upload.
- Click Upload to upload the scanned document.
Upload the Document

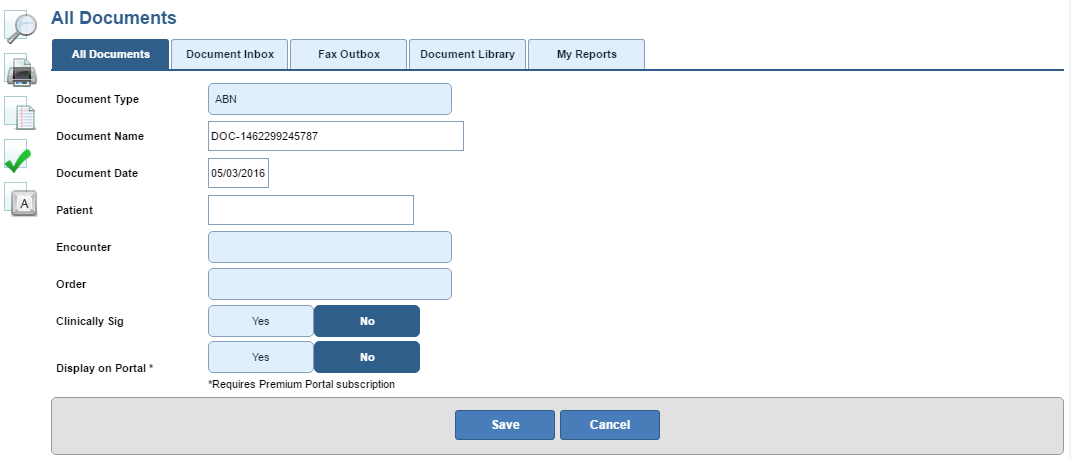
- Make your selections.
- The Document Name is autofilled, but is editable.
- The Document Date is the current date.
- For more field descriptions, refer to Single File Upload.
- Click Save.
- The document displays on the All Documents page.
See Also:
All Documents
Patient Documents
Single File Upload