You can use the Tasks & Messages tool to send staff messages from one user to another user for interoffice communication. You can also send tasks from one user to another user. If staff messages or tasks are associated to a specific patient, the staff message or task is documented in the patient’s chart. You can send messages to patients, which they receive in their NextGen® Office Patient Portal accounts. You can use Direct messaging to send order requisition and clinical summary details to a provider in another EHR system. You can create a chart note or chart alert that appears in the patient chart.
Send a Staff Message
| From within | Navigation Path |
|---|
| NextGen® Office EHR |
- Select Tasks & Messages Tool
 on the left navigation bar. on the left navigation bar.
The Tasks & Messages tool opens. Task is the default option.
- Select Staff Message.
|
| NextGen® Office EHR > My Messages |
- Select My Messages
 on the top navigation bar. on the top navigation bar. - Select Create Message.
The Tasks & Messages tool opens. Staff message is the default option.
|
| NextGen® Office PM |
- Select Tasks & Messages on the menu bar.
- Select New Tasks & Messages.
The Tasks & Messages tool opens. Task is the default option.
- Select Staff Message.
|
- In the Recipients List pane, select the recipient's name from the user list. To collapse the Recipients List pane, select Done.
Note: To save the recipients as a group, select the recipients, enter the group name, use the Private Group button to switch from private group to public group, and then select Save.
- Optional: To add CC recipients, select CC, and then select the recipient's name from the user list or select the group name.
- Optional: Select a priority. Normal is the default priority.
- Optional: To send an email notification to the recipient, next to Send email notification?, select Yes.
- Optional: To associate the staff message to a patient, enter the patient's name in the Patient field and select their name.
- Enter the subject and message content.
Note: The character limit for the text field is 4,000 characters.
- Select Save.
Send a Patient Message
Prerequisite: The patient chart must contain an email address for the patient. In the NextGen® Office PM chart, in the Patient Contact Information section, select the Email check box next to Electronic Notifications. Turn on Patient Messaging in Administration: Patient Messaging.
| From within | Navigation Path |
|---|
| NextGen® Office EHR |
- Select Tasks & Messages Tool
 on the left navigation bar. on the left navigation bar.
The Tasks & Messages tool opens. Task is the default option.
- Select Patient Message.
|
| NextGen® Office EHR > My Messages |
- Select My Messages
 on the top navigation bar. on the top navigation bar. - Select Create Message.
The Tasks & Messages tool opens. Staff message is the default option.
- Select Patient Message.
|
| NextGen® Office PM |
- Select Tasks & Messages on the menu bar.
- Select New Tasks & Messages.
The Tasks & Messages tool opens. Task is the default option.
- Select Patient Message.
|
- Optional: To add CC recipients, select CC, and then select the recipient's name from the user list or select the group name. To collapse the Recipients List pane, select Done.
- Enter the patient's name in the Patient field and select their name.
- Enter the subject and message content.
- Select Save.
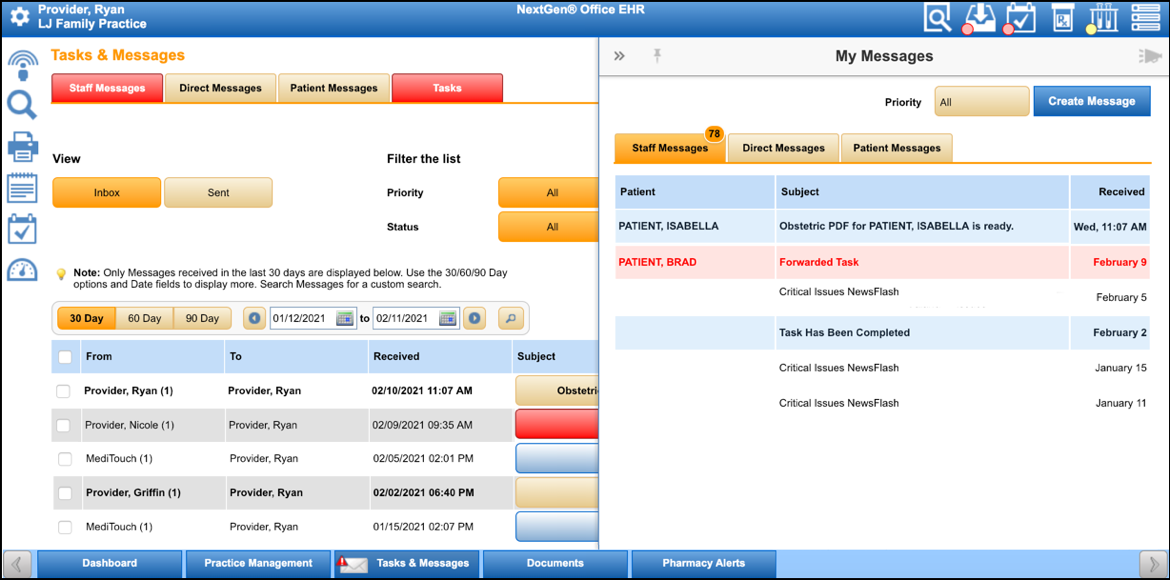
View Messages in Tasks & Messages
You can view messages in Tasks & Messages. If any of the message tabs are red, you have an unreviewed message (status is new). A red alert icon appears in the left corner of the Tasks & Messages icon  if you have an unreviewed message. For staff and patient messages, the subject's button color is based on the message priority.
| Priority | Button Color |
|---|
| High | Red |
| Medium | Yellow |
| Low | Green |
| Normal | Default |
| System | Blue |
View Messages in My Messages
You can view messages in My Messages. A red indicator appears on the left corner of the My Messages icon  if you have an unreviewed message. Messages appear with color-coded shading based on the priority of the message. You can filter staff messages by priority.
| Priority | Shade Color |
|---|
| High | Red |
| Medium | Yellow |
| Low | Green |
| Normal | None |
| System | None |
Work a Message
You can forward, reply, or delete a message. You can also open attachments such as patient charts, encounters, and tasks.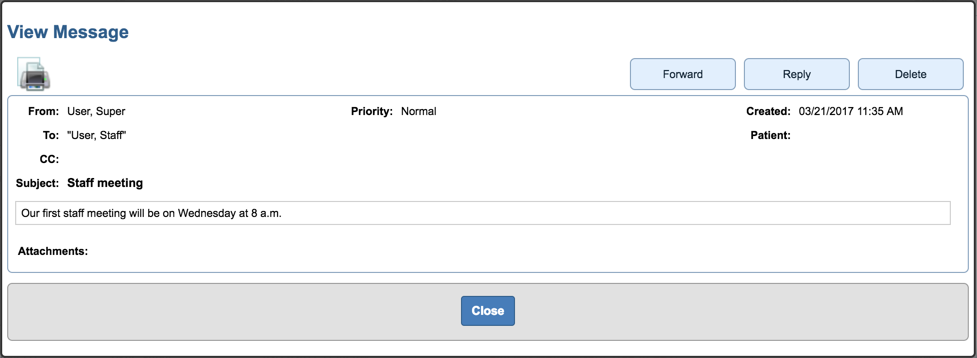
Send a Task
| From | Navigation Path |
|---|
| NextGen® Office EHR > My Tasks |
- From the top navigation bar, select My Tasks
 . . - Select Create Task.
The Tasks & Messages tool opens. Task is the default option.
|
| NextGen® Office EHR > Tasks & Messages |
- From the left navigation bar, select Open Tasks & Messages Tool
 . .
The Tasks & Messages tool opens. Task is the default option.
|
- In the Recipients List pane, select the recipient's name from the user list or select the group name.
Note: To save the recipients as a group, select the recipients, enter the group name, use the Private Group button to switch from private group to public group, and then select Save.
- Optional: To add CC recipients, select CC, select the recipient's name from the user list or select the group name.
- To collapse the Recipients List pane, select Done.
- Optional: Select a priority. Normal is the default priority.
- Optional: Select a due date.
- Optional: To send an email notification to the recipient, next to Send email notification?, select Yes.
- Optional: To receive a system notification upon task completion, next to Notify me upon task completion, select Yes.
Note: You receive staff messages when recipients accept, reject, or complete tasks.
- Select the task type.
- Optional: To associate the task to a patient, enter the patient's name in the Patient field, and then select their name.
- Enter the subject and message content.
Note: The character limit for the Subject field is 200 characters.
- Select Save.
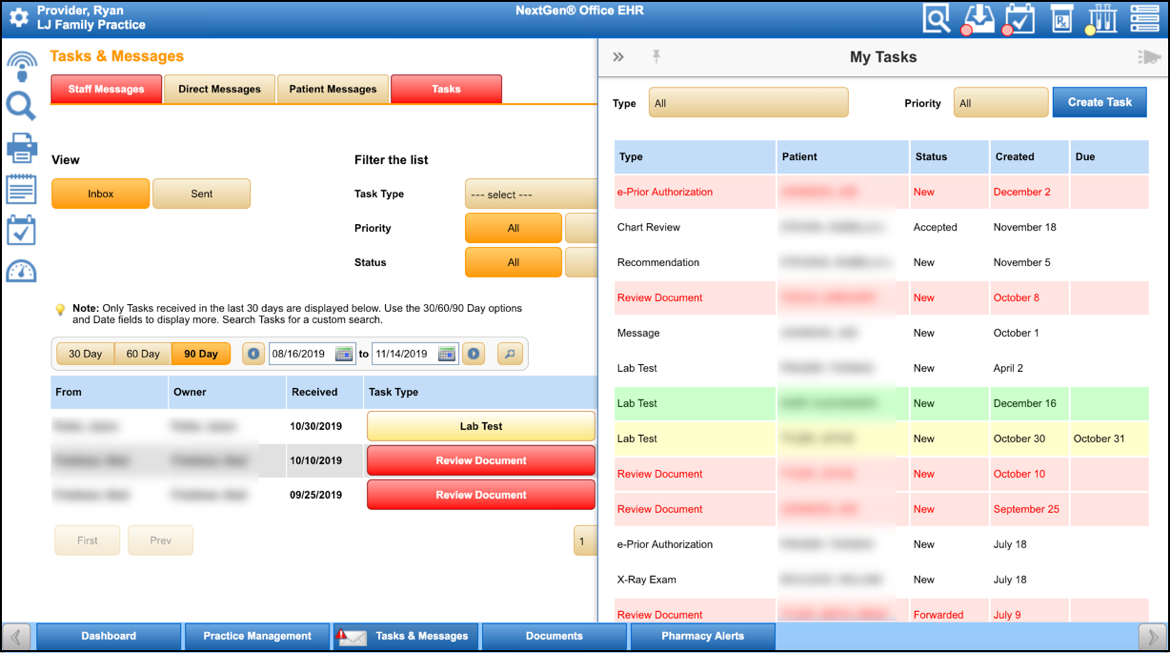
View Tasks in Tasks & Messages
You can view tasks in Tasks & Messages. If the Tasks tab is red, you have an unreviewed task (current status is new). The task type's button color is based on the task priority.
| Priority | Button Color |
|---|
| High | Red |
| Medium | Yellow |
| Low | Green |
| Normal | Default |
The status filter in the Tasks Inbox defaults to New, Forwarded, and Accepted by Me. You can multi-select statuses in the Inbox. If you are viewing tasks from the Tasks & Messages tab within a patient chart, the status filter defaults to All.
View Tasks in My Tasks
You can view tasks in My Tasks. The task's shade color is based on the priority. You can filter tasks by type and priority.
| Priority | Shade Color |
|---|
| High | Red |
| Medium | Yellow |
| Low | Green |
| Normal | None |
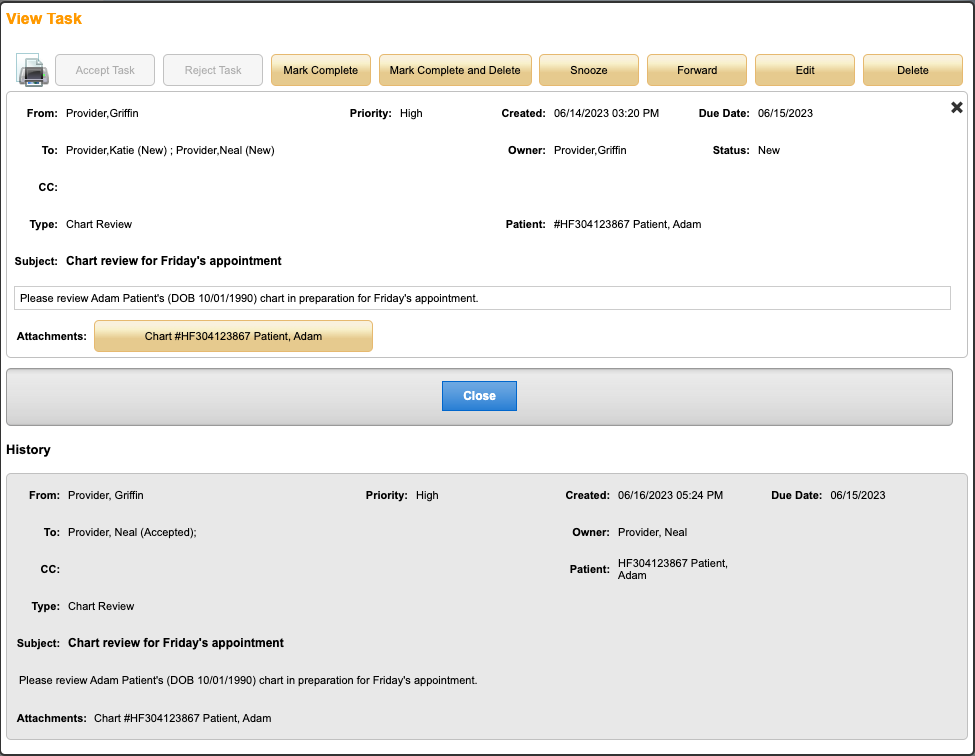
Work a Task Sent to One User
You can work a task in several ways. When you first open a task, you can accept or reject a task, forward it to another user, or delete the task.
- To accept a task, select Accept Task.
- To reject a task, select Reject Task.
- To forward a task to another user, select Forward.
- To change the priority, add notes, or change the due date (if there was one), select Edit. When you select Update, the changes save to the History pane.
- To delete a task, select Delete.
Note: When you delete a task, it moves to the Deleted filter. To restore a deleted task, select that task, and then select Restore.
- To open the patient chart or encounter summary, select the attachment.
- Review a task's history in the History pane.
If the sender requested to be notified upon task completion, a staff message is sent when the recipient accepts, rejects, or completes the task. When the recipient accepts the task, they can mark the task as complete.
- To mark the task as complete, select Mark Complete.
- To mark the task as complete and delete the task from your inbox, select Mark Complete and Delete. When you delete a task, it moves to the Deleted filter.
- To restore a deleted task, select that task, and then select Restore.
- To change the due date (if there was one), select Snooze. This button activates when you reopen the task after accepting it. When you select Update, the changes save to the History pane.
- To forward the task to another user, select Forward.
- To change the priority, add notes, or change the due date (if there was one), select Edit. When you select Update, the changes save to the History pane.
Work a Task Sent to Multiple Users
You can work task sent to multiple users (or a group) in the same way you would for a task sent to one user. When you first open a task, you can accept or reject a task, forward it to another user, or delete the task. When a group task is accepted, completed, or deleted by one staff member, the system automatically updates the status of the task to accepted, completed, or deleted for all members of the group.
- To accept a task, select Accept Task.
Note: In Tasks & Messages, to view your accepted tasks, select Accepted by Me. To view tasks accepted by others, select Accepted by Others.
- To reject a task, select Reject Task.
- To forward a task to another user, select Forward.
Note: When you forward a group task (task sent to multiple users or a group) to a user outside of the original group, the task is deleted from the user's inbox who forwarded the task and moves to the sent filter. The task remains in the other group members' inboxes.
- To change the priority, add notes, or change the due date (if there was one), select Edit. When you select Update, the changes save to the History pane.
- To delete a task, select Delete.
Note: A task sent to multiple users can only be deleted by the user who accepted the task. This delete restriction also applies when a group task is forwarded to additional users. When you delete a task, it moves to the Deleted filter. When one group member deletes a task that has been sent to multiple users, the system automatically deletes the task from the remaining group members.
- To restore a deleted task, select that task, and then select Restore.
- To open the patient chart or encounter summary, select the attachment.
- Review a task's history in the History pane.
If the sender requested to be notified upon task completion, a staff message is sent when the recipient accepts, rejects, or completes the task. When the recipient accepts the task, they can mark the task as complete.
Note: A task sent to multiple recipients can only be marked as complete by the user who accepted the task. Recipients who did not accept the task can only edit or delete the task.
- To mark the task as complete, select Mark Complete.
- To mark the task as complete and delete the task from your inbox, select Mark Complete and Delete. When you delete a task, it moves to the Deleted filter.
- To restore a deleted task, select that task, and then select Restore.
- To change the due date (if there was one), select Snooze. This button activates when you reopen the task after accepting it. When you select Update, the changes save to the History pane.
- To forward the task to another user, select Forward.
- To change the priority, add notes, or change the due date (if there was one), select Edit. When you select Update, the changes save to the History pane.
Create a Chart Note
You can create a chart note that appears in the patient chart in the Chart Notes tab.
- In NextGen® Office EHR, from the left navigation bar, select Tasks & Messages Tool
 .
.
The Tasks & Messages tool opens.
- Select Chart Note.
- Enter the note.
- To associate the note to a patient, enter the patient's name in the Patient field, and then select their name.
- Select Save.
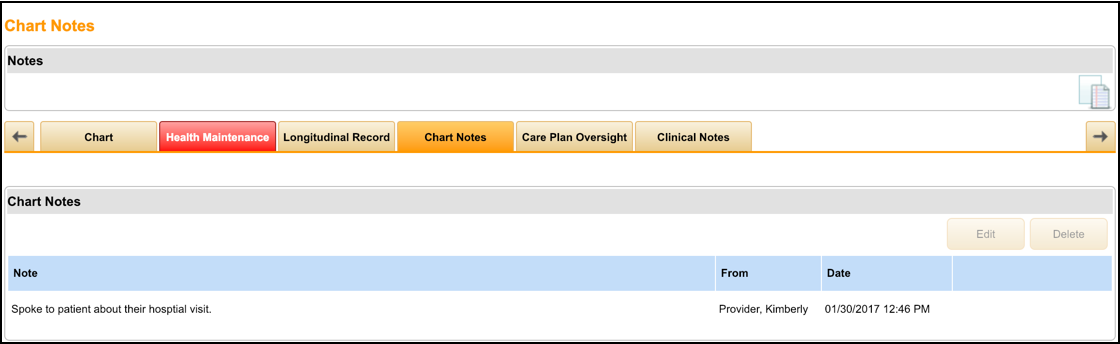
View a Chart Note
Chart notes appear in a patient's chart in NextGen® Office EHR. Select the Chart Notes tab. Only the note's creator can edit or delete the note.
Create a Chart Alert
- In NextGen® Office EHR, from the left navigation bar, select Tasks & Messages Tool
 .
.
The Tasks & Messages tool opens.
- Select Chart Alert.
- Associate the alert to a patient.
- Select the alert type. Personal alert is the default selection. For a practice alert, select the button to toggle the selection to Practice Alert.
- Enter the alert description.
- Select Save.
View a Chart Alert
Chart alerts appear in the patient chart and encounters at the top of the page.
- In NextGen® Office EHR, open the patient chart or an encounter.
- To dismiss the alert, select Dismiss Alerts. This does not delete the alert. This alert will still show every time you open the patient's chart or encounter until you delete it.
Delete a Chart Alert
- In NextGen® Office EHR, open the patient chart or an encounter.
- Select the red X icon
 .
. - Select OK to confirm the deletion.
Edit a Chart Alert
- In NextGen® Office EHR, open the patient chart or an encounter.
- Select the paper and pencil icon
 .
. - Make your changes.
- Select Save.
See Also
Last Updated: 4/25/25

