Patient Portal Co-branding Setup
The Patient Portal Co-branding Setup feature enables you to co-brand the YourHealthFile Patient Portal to resemble your practice’s website.
Co-branding
With Patient Portal co-branding, practices can display their practice’s website branding throughout YourHealthFile.
- Practices upload a logo to display in the Patient Portal header and within outbound patient emails.
- Practices display their website URL as the Patient Portal login link in outbound patient emails and portal access print instructions (these instructions are generated when practices Enable Access to the Patient Portal for their patients).
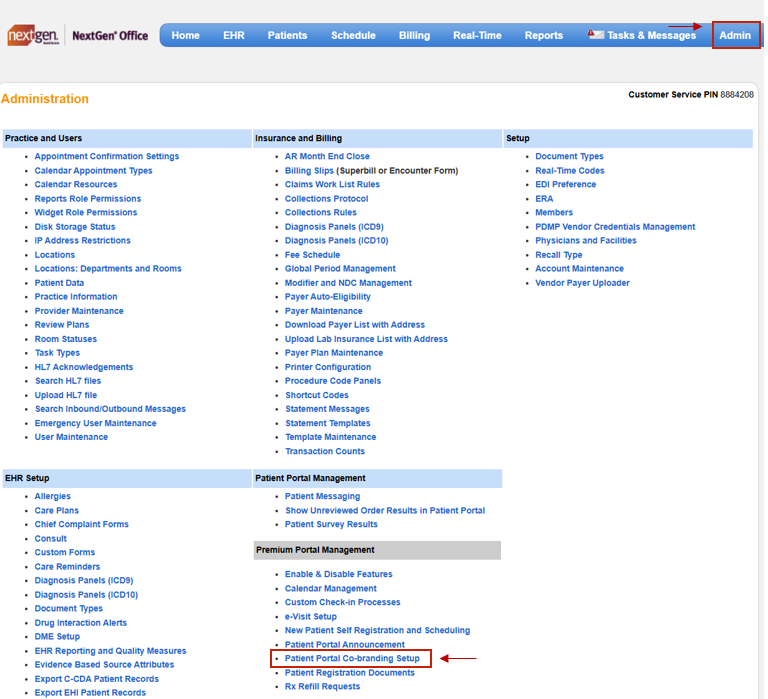
- From the menu bar, click Admin and then click Patient Portal Co-branding Setup.
Website URL
Entering the practice’s website URL initiates two actions:
- After patients log out of the Patient Portal, they are redirected to your practice’s website.
- Your practice’s website URL displays as the login link for the Patient Portal in patient emails and in portal access instructions.
Note: If you enter a URL, you must host the login so that patients log in to the Patient Portal directly from your practice’s website.
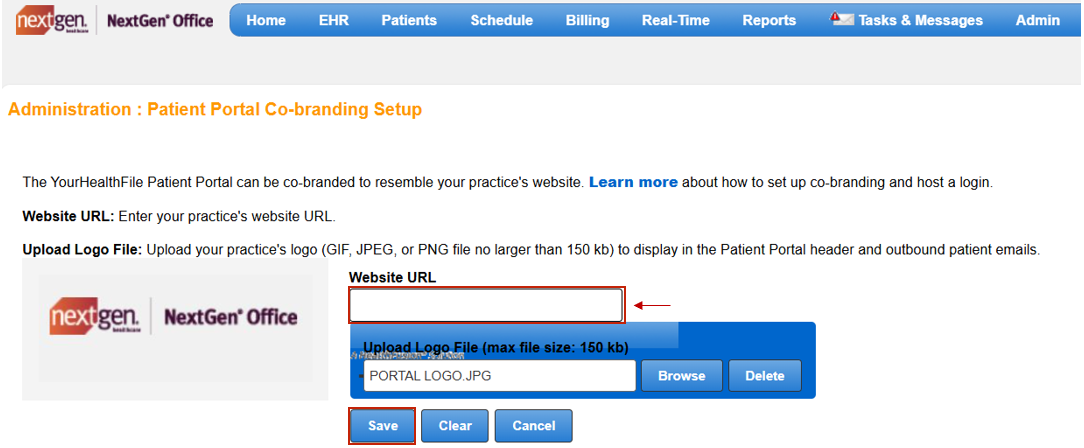
- Enter your practice’s website URL.
- Click Save.
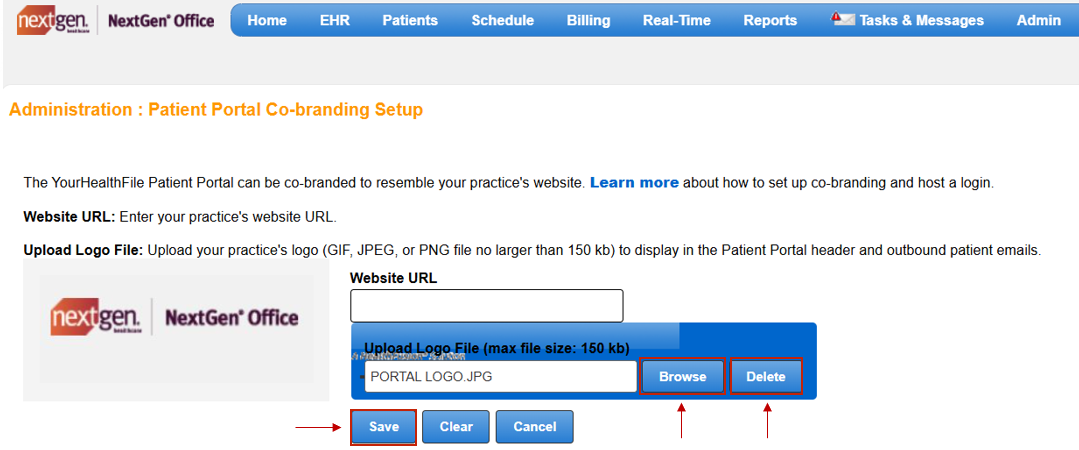
- To remove the website URL or both the URL and the logo file, click Clear. To remove a previously saved URL or both a saved URL and logo file, click Clear and then click Save.

- The practice’s website URL is displayed as the login link in the patient email.

- The practice’s website URL is displayed as the login link in the patient’s portal access instructions.
Practice Logo
After you upload a practice’s website logo, it will display in the Patient Portal header in place of the YourHealthFile logo and at the top of outbound patient emails.
- Click Browse to search your computer for your practice’s logo file (GIF, JPEG, or PNG no larger than
150 kb), select the file, and then click Open. - Click Save.
- To delete a selected image, click Delete. To delete a previously saved image, click Delete and then click Save.
- To remove a previously saved URL and logo file, click Clear and then click Save.

- The logo is displayed in the Patient Portal header in place of the YourHealthFile logo.
- The logo is displayed at the top of outbound patient emails.
Appointment Confirmation Emails
After the practice confirms the patient’s appointment, the patient receives an appointment confirmation email.

- To confirm the appointment, click Confirm Your Appointment. A new browser tab will open indicating that the appointment has been confirmed.
- To add the appointment to the patient’s Google calendar, click Add to Google Calendar.
- To download, save, or open the ICS file, click Download. The action that is performed depends on which Internet browser you use and how your browser settings are configured.
Downtime

- The Patient Portal may be occasionally unavailable due to scheduled maintenance. Under normal circumstances, this downtime will not be scheduled during normal Monday–Friday business hours.
- If the Patient Portal is taken offline, the login screen will be replaced with a message alerting the patient of the downtime.
Last Update: 3/15/25

