Patient Chart: Flow Sheets
Flow sheets are used to collect and store clinical data, often for tracking or trending progress. Flow sheets are very useful for documenting and graphing relevant data points for important patient conditions.
For information on how to navigate to the flow sheets page from an encounter and add the result history to the encounter summary, go to Encounters: Flow Sheets.
There are two types of flow sheets:
- Standard: Contains one value
- Multi-value: Contains two or more values with customized value titles
Create a Standard Flow Sheet
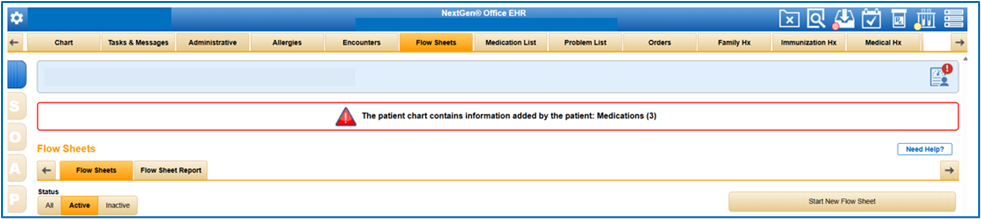
- From the EHR Dashboard, navigate to a patient’s chart.
- Select the Flow Sheets tab.
- Select Start New Flow Sheet.
- The Type field defaults to Standard.
- Enter the flow sheet’s title.
- Select Save To option - (Patient or Practice).
- Select Save.
Add a Result
- Select Add a Result.
- Enter the date and value.
- Select Save.

Delete a Result
- To delete a result, highlight the result row, select Delete, and then select OK to confirm the deletion.

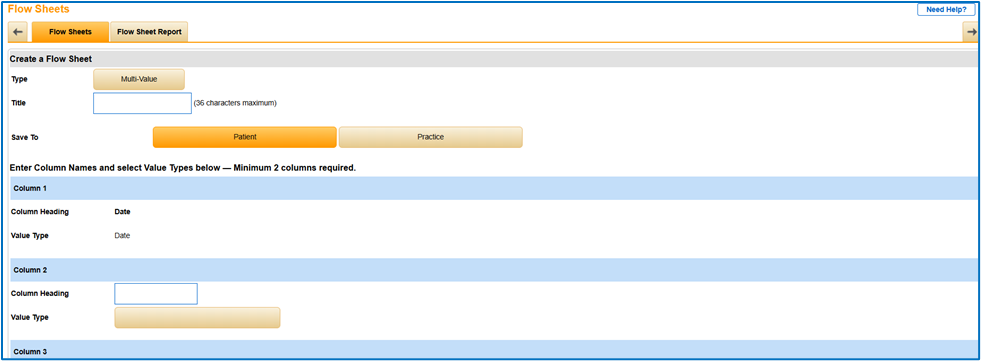
Create a Multi-Value Flow Sheet
- From the EHR Dashboard, navigate to a patient’s chart.
- Select the Flow Sheets tab.
- Select Start New Flow Sheet.
- Select the Type field, so it toggles to Multi‑Value.
- Enter the flow sheet title.
- Select Save To option - (Patient or Practice)
- Enter the column headings and value types.
- The first column heading and value type defaults to Date.
The Value Type options include:
- Yes/No: Value is yes or no
- Numeric: Value can only be numeric
- Text: Value can only be text
- Date: Value is a date
- Select: Value can only be one chosen from a select menu
- Toggle: Value can only be one selected from a toggle menu
- Multi: Value can be as many as needed selected from a checkbox list
- When Select, Toggle, or Multi is selected, enter the respective values in the text boxes.
- If you need more than eight columns, select +Add a row for every additional column needed.
- Select Save.
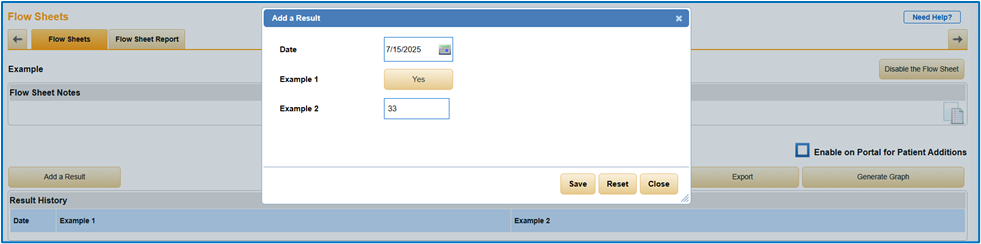
Add a Result
- Select Add a Result.
- Enter the date and values.
- Select Save.
Delete a Result
- To delete a result, highlight the result row, select Delete, and then select OK to confirm the deletion.
Additional Information
The information in this section pertains to both standard and multi-value flow sheets.
Disable a Flow Sheet
- To delete the current flow sheet, select Disable the Flow Sheet.

- Review the Alert.
- Select Proceed.

Enable Patient Portal Access
- To allow patients to add results through the Patient Portal, select Enable on Portal for Patient Additions.

Generate Graph Results
- To view a graph of all of the values entered in a flow sheet, select Generate Graph.

- The graph displays below.
- If you no longer need to view the graph, select Close Chart.
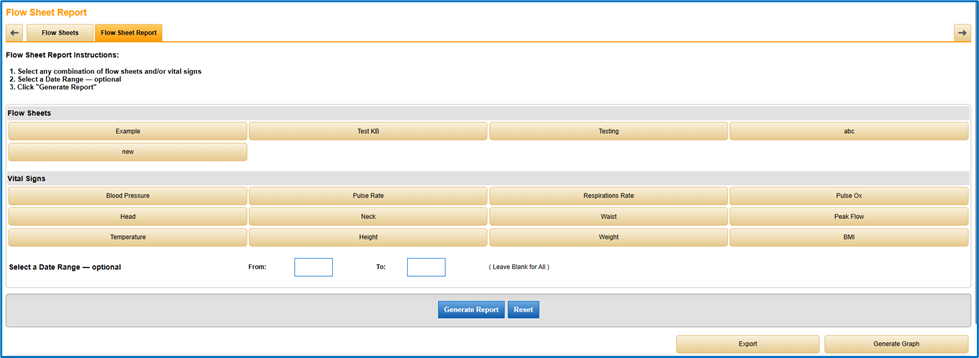
Flow Sheet Report
- Select the Flow Sheet Report tab.
- Select any combination of flow sheets and/or vital signs.
- Enter a date range (optional).
- Select Generate Report.
- The generated report displays below.
- To export the report into an Excel spreadsheet, select Export.
- To view a graph of the report, select Generate Graph.
Alerts
- To create a new alert, select Set Alert and then select Create a New Alert.
- Enter a Title.
- Select Save To option - (Patient or Practice).
- Set the rules. Select + or - to add or remove, respectively, a rule.
- Select Save.

- To set an alert, select Set Alert.
- To set a practice or patient alert, choose from their select menus.

- To remove an alert, highlight the alert row and select Remove.
- To edit an alert’s title, Save To selection, or rule, highlight the alert row and select Edit. Make your edits and select Save.
- To change the Notify, Communication, and Status selections, highlight the alert row, reselect from the options, and then select Save Changes.

Create a Flow Sheet from an Electronic Result
To create a flow sheet from an electronic result, your account must first be interfaced with a lab company. After the account has been interfaced, a few steps must be completed to add data to an existing or new flow sheet.
- From the Orders tab, select w/ Results.
- The lightning bolt icon next to an order indicates that there is an electronic result for that order. To view the electronic result, select the lightning bolt icon.
- Select
 next to a desired piece of data.
 - Begin tracking data on a new flow sheet or add data to an existing flow sheet.
- Select Save.
See Also:
Encounters: Flow Sheets
Webinar Course Outlines - Discover Advanced EHR Tools: Flow Sheets, Document Templates and Ambient Assist
Last Review Date: 7/17/25

